網(wǎng)站城市跳轉(zhuǎn)怎么做鄭州seo優(yōu)化外包
命令行交互核心實現(xiàn)
- 核心目標(biāo):實現(xiàn)命令行行交互,如List
- 命令行的交互呢比命令行的渲難度要更大,因為它涉及的技術(shù)點會會更多
- 它涉及以下技術(shù)點
- 鍵盤輸入的一個監(jiān)聽 (這里通過
readline來實現(xiàn)) - 計算命令行窗口的尺寸
- 清屏
- 光標(biāo)的移動
- 輸出流的靜默 (我們輸出的內(nèi)容, 不讓它去輸出到當(dāng)前的這個終端中)
- 借助輸入輸出流,引出輸入輸出流的一個監(jiān)聽以及事件庫
events - ansi escaped code 轉(zhuǎn)義字符
- 鍵盤輸入的一個監(jiān)聽 (這里通過
- 命行交互其實是有一定復(fù)雜度的, 在這個過程中,最重點的庫和命行交互最重點庫是兩個
readline和inquirer
inquirer
- inquirer 是一個命令行交互常用的庫,Weekly Downloads 30,375,340 (動態(tài)數(shù)據(jù))
- 作為一個命令行交互的庫能做到這個程度,可以說是非常的不簡單,而且一直在持續(xù)的進(jìn)行維護(hù),目前已經(jīng)達(dá)到9.2.15版本了
- 安裝 $
npm i -S inquirer - 使用示例1:input類型演示
import inquirer from 'inquirer'; inquirer.prompt([{type: 'input',name: 'yourName',message: 'your name:',}]).then((answers) => {console.log(answers);}).catch((error) => {if (error.isTtyError) {// Prompt couldn't be rendered in the current environment} else {// Something else went wrong}});- 這里根據(jù)文檔上的框架結(jié)構(gòu)
- 通過 type, name, message 三個字段即可完成初始化創(chuàng)建
- 更多,參考文檔:https://www.npmjs.com/package/inquirer#question

效果實例
- 另外,比較常用的還有
- default 默認(rèn)值字段
- validate 字段是一個回調(diào)
- 用于對字段的校驗,只有校驗返回 true的時候校驗才會結(jié)束
- transformer 字段用于處理信息展示的回調(diào)
- 也就是這個函數(shù)內(nèi)部返回的值是展示的值
- 返回的值還是之前的 name 字段
- 更多的像是表單中的 placeholder 僅作為展示
- filter 字段是一個回調(diào)
- 它會最終改變 answers 最終的結(jié)果
- 會最終改變 name 字段
- 其他: choice 在匹配 List 列表的時候會用到
- 注意,
prompt方法內(nèi)部接受的是一個數(shù)組,可以寫多個對象來收集數(shù)據(jù) - 使用示例2: 多字段演示
import inquirer from 'inquirer';inquirer.prompt([{type: 'input',name: 'yourName',message: 'your name:',default: 'Lee',validate: function(v) {return v === 'Wang'},transformer: function(v) {return 'your input name: ' + v // 僅作為展示},filter: function(v) {return v;// return v + '123' // 改變最終值}},{type: 'number', // 這種,在沒有 validate 的情況下,如果輸入的是非數(shù)字, 會變成 NaNname: 'num',message: 'your number',},// ...]).then((answers) => {console.log(answers); // 最終打印的是一個對象,多個字段}).catch((error) => {if (error.isTtyError) {// Prompt couldn't be rendered in the current environment} else {// Something else went wrong}});- 在示例1中已做了詳細(xì)說明,這里不再贅述
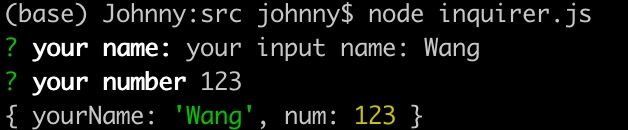
效果實例
- 使用示例3: confirm 類型演示
import inquirer from 'inquirer';inquirer.prompt([{type: 'confirm', // 二選一功能name: 'choice',message: 'your choice:',default: false,},]).then((answers) => {console.log(answers);}).catch((error) => {if (error.isTtyError) {// Prompt couldn't be rendered in the current environment} else {// Something else went wrong}});
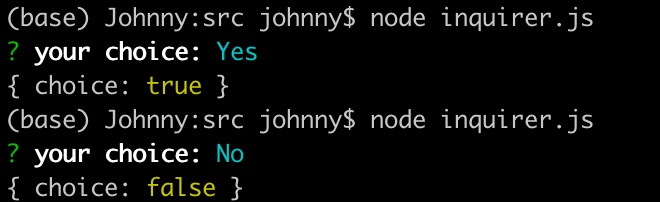
效果實例
- 使用示例4: list 類型演示
import inquirer from 'inquirer';inquirer.prompt([{type: 'list', // 列表單選name: 'choice',message: 'your choice:',default: 0, // 這里 default 是 下面choices 的索引choices: [{value: 1, name: 'LiLy'},{value: 2, name: 'Lucy'},{value: 3, name: 'Lee'},]},]).then((answers) => {console.log(answers);}).catch((error) => {if (error.isTtyError) {// Prompt couldn't be rendered in the current environment} else {// Something else went wrong}});
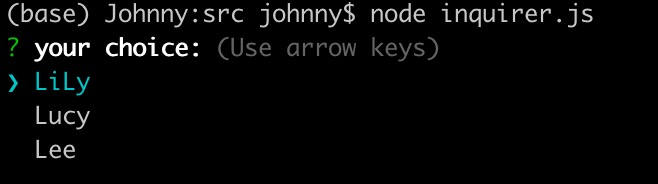
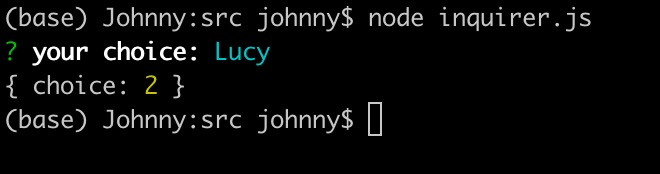
效果實例
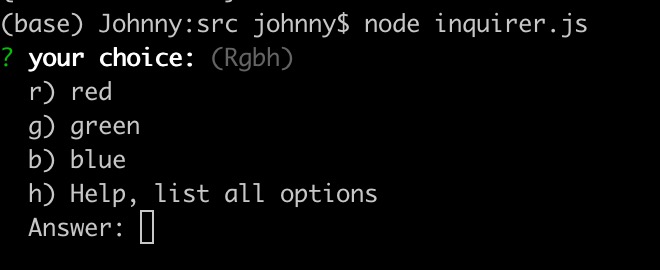
- 使用示例5: expend 類型演示
import inquirer from 'inquirer';inquirer.prompt([{type: 'expand', // 簡寫選擇name: 'choice',message: 'your choice:',default: 'red',choices: [{value: 'red', key: 'R'},{value: 'green', key: 'G'},{value: 'blue', key: 'B'},]},]).then((answers) => {console.log(answers);}).catch((error) => {if (error.isTtyError) {// Prompt couldn't be rendered in the current environment} else {// Something else went wrong}});- 簡寫選擇功能,除了 Rgb 還有一個 h
- 輸入 h 回車,會得到 help 提示,列出了所有選項
- 輸入 r 回車,會得到 red, 輸入 g 回車,會得到 green

效果實例
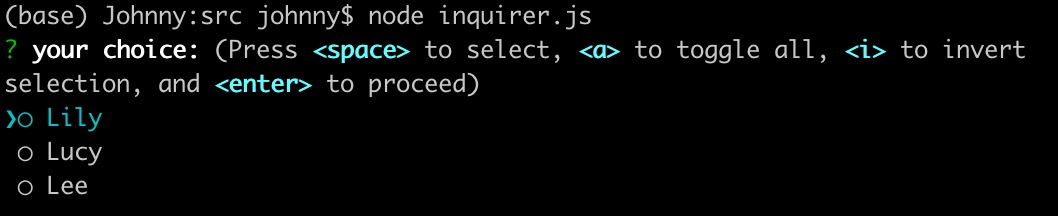
- 使用示例6: checkbox 類型演示
import inquirer from 'inquirer';inquirer.prompt([{type: 'checkbox', // 復(fù)選框name: 'choice',message: 'your choice:',default: 0,choices: [{value: 1, name: 'Lily'},{value: 2, name: 'Lucy'},{value: 3, name: 'Lee'},]},]).then((answers) => {console.log(answers);}).catch((error) => {if (error.isTtyError) {// Prompt couldn't be rendered in the current environment} else {// Something else went wrong}});- 這里提供 a 全選,空格鍵 選中,i 反選的功能
- 默認(rèn),上下箭來選擇

效果實例
- 使用示例7: password 類型演示
import inquirer from 'inquirer';inquirer.prompt([{type: 'password', // 密碼框name: 'password',message: 'your password:',},]).then((answers) => {console.log(answers);}).catch((error) => {if (error.isTtyError) {// Prompt couldn't be rendered in the current environment} else {// Something else went wrong}});

效果實例
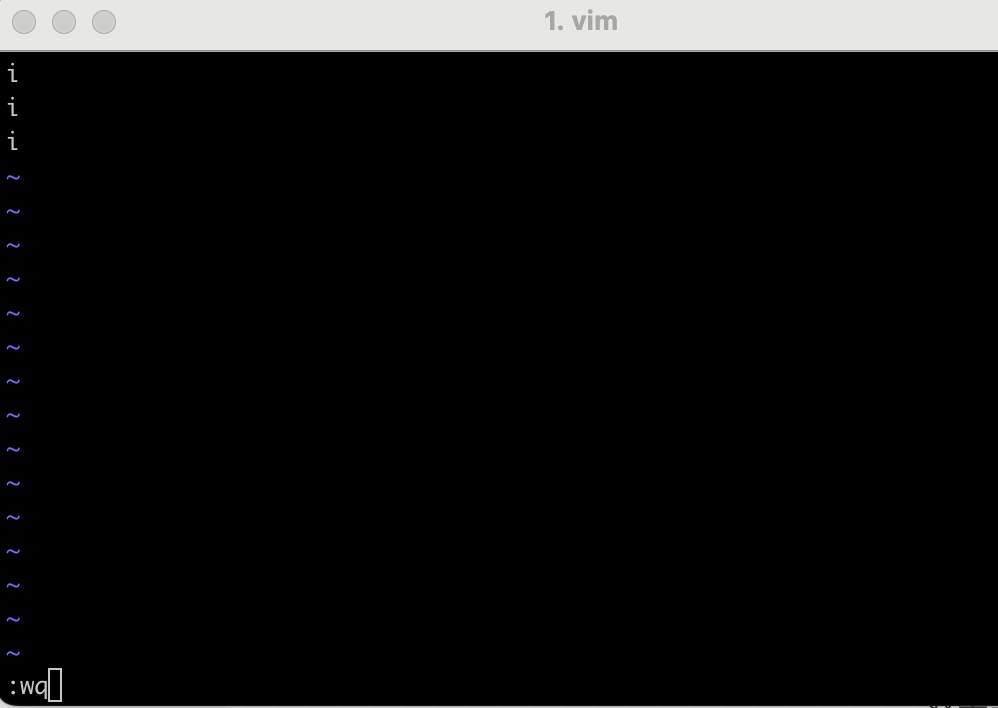
- 使用示例8: editor 類型演示
import inquirer from 'inquirer';inquirer.prompt([{type: 'editor', // 編輯器name: 'editor',message: 'your editor text:',},]).then((answers) => {console.log(answers);}).catch((error) => {if (error.isTtyError) {// Prompt couldn't be rendered in the current environment} else {// Something else went wrong}});


效果實例
- 上面中間的這個類似 vim 的界面,會在一個緩存文件中,輸入完以后,緩存文件被刪除掉
- 我們輸入的結(jié)果會被保留下來,如上圖
- 這樣做的好處是在文本編輯器中輸入復(fù)雜的內(nèi)容
readline
- readline,是 nodejs 當(dāng)中的一個內(nèi)置庫,主要幫我們?nèi)ス芾頂?shù)據(jù)流的
- 命令行當(dāng)中要交互的方式,一定是需要用戶提供一些輸入的
- readline 就可以很好的幫我們?nèi)ヒ淮我淮蔚淖x取這個輸入流
- 注意,這個輸入不僅是指我們輸入一些字符,還包含我們鍵盤上輸入的一切,如上,下,空格,回車等
- 基本使用
import * as readLine from 'readline';const rl = readLine.createInterface({input: process.stdin,output: process.stdout,
});rl.question('your name: ', (answer) => {console.log(answer);rl.close(); // 關(guān)閉讀取流
})

- readline 主要用途是根據(jù)傳入的輸入流逐行讀取信息
- 回車的時候,會認(rèn)為這行輸入結(jié)束,并且把所有輸入的內(nèi)容傳遞到輸出流中進(jìn)行展示
- 這是readline的核心用途
- 如果調(diào)試 readline 源碼,可知,它內(nèi)部會強(qiáng)制將函數(shù)轉(zhuǎn)換為構(gòu)造函數(shù)
if (!(this instanceof Interface)) {return new Interface(input, output, completer, terminal); } - 接著是對 StringDecoder的判斷和賦值,這個也是node的一個內(nèi)置庫
if (StringDecoder === undefined) {StringDecoder = require('string_decoder').StringDecoder; } - 再之后,定義了一些列的參數(shù),調(diào)用了 EventEmitter
EventEmitter.call(this)- 這個用途是使用 this 繼承 EventEmitter, this內(nèi)部就會生成一些列的屬性信息,如 _events, _eventsCount
- 讓當(dāng)前 Interface 實例具備事件驅(qū)動的能力,因為nodejs有單線程,非阻塞IO,事件驅(qū)動的特性
- 也就是說事件驅(qū)動,在單線程的nodejs中是非常重要的
- 再接著,定義一些參數(shù), 對 input 進(jìn)行判斷,也就是分析 input 參數(shù)
if (input && input.input) {// .... } - 再往后找,看readline是如何做事件監(jiān)聽的
this.output = output; // output: WriteStream 系統(tǒng)輸出流 this.input = input; // input: ReadStream 系統(tǒng)輸入流// ...emitKeypressEvents(input, this) // 這里就是監(jiān)聽用戶在終端中的鍵盤輸入- 在 emitKeypressEvents 函數(shù)內(nèi)部,會調(diào)用一個 emitKeys 的方法
- 這里是核心, 其原理和源碼不在這里進(jìn)行剖析